How to make the most effective use of washer cleaning?

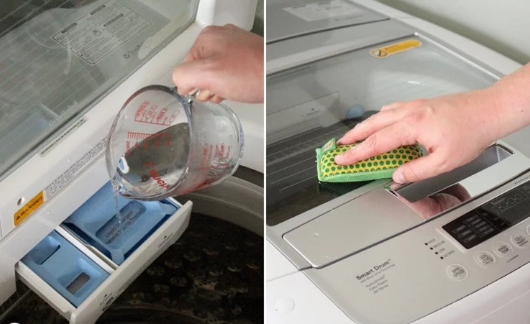
Washer cleaning is a convenient method with the help of which the users can easily clean their laundry items without having to do anything manually. In most parts of the world, the users can have access to laundromat as well as purchase a washing machine for using at home. The washing machine can easy clean laundry items in a short period and in case the dryer facility is also available then and it is possible to dry the items at the same time. The washer cleaning saves people a lot of time and money as the washing machines are high-grade equipment and they can perform efficiently for a long period. While most people use washer cleaning for their laundry items, they are usually unaware of its various other benefits. In this article below, we will discuss some of the ways with the help of which the users can make an effective use of washer cleaning.

Cleaning mats in a washer

The mats can get dirty overtime and the users may have to seek the services of professional cleaners for the purpose of cleaning. However, it can add to the budget of users since most professional service providers charge hefty amount for cleaning mats. On the other hand, it is possible to clean mats in a washer if the right kind of gear is available for the purpose. The users can easily clean mats in a watcher, if a center agitator is available. In case the center agitator is available, then users can easily arrange the mats around the agitator and clean it in a regular washer cycle. For more about Missoula carpet cleaning tips.

Cleaning shoes in a washer

Another important benefit of washer cleaning is the ability to clean shoes in an effective manner. In order to wash shoes in a washing machine, the users can place them in a washing bag and perform a regular cleaning process cycle in order to remove dirt from the shoes. However, not all types of shoes can be cleaned in a washer as some materials may get affected due to the extreme washing process. Therefore, we recommend that the users should get the advice of the manufacturer before washing the shoes in a washer.

Cleaning stuffed toys in a washer

Children are usually in a habit of getting their hands dirty due to which they will also unsanitize the toys. Similarly, due to the regular use, the stuffed toys may also start to accumulate dirt and all sorts of residue particles that will affect their outlook. It may be difficult to clean the toys manually, therefore, we recommend the readers to clean them in a washer. It is appropriate to place them in a washing bag and clean in a gentle cycle while using an appropriate cleaning agent. We do not recommend the method for electronic toys.

Cleaning bags, boxes and sports gear in a washer

It is highly effective to clean different types of bags, boxes, and sports gear in a washer by simply applying a gentle cleaning cycle. In order to protect them from the rough cleaning, we recommend placing them in laundry bags so that an effective cleaning will take place.

How to perform the velvet cleaning process?

How to perform the velvet cleaning process

Most people have to perform velvet cleaning process at homes on a regular basis since it is one of the most commonly used fabrics for making clothes and upholstery. Velvet is a smooth material with superior qualities and it gives a beautiful look. However, like everything else, it also starts to get dirty over the course of time due to common use and environmental conditions. Velvet is also a sophisticated material, which means that special care is necessary in order to protect and clean the fabric. In this article, we will explain a velvet cleaning process with the help of which the readers will be able to clean the fabric at home while maintaining the level of special care required.

Supplies required to perform the cleaning process

Few supplies are necessary in order to perform the cleaning process depending upon the nature of the item that needs cleaning. In case, the velvet clothes have to be cleaned then the process will be different as compared to when velvet upholstery has to be cleaned. In this article, we will explain a process to clean velvet clothes since we have already explained the dry cleaning process, which is applicable for cleaning velvet upholstery. Some of the supplies required to perform the velvet cleaning process or as follows:

  1. Cleaning agent: In order to perform the process, various cleaning agents are available in the market. However, it is also possible to clean velvet using natural cleaners such as baking soda. Therefore, we recommend using baking soda in order to clean normal velvet clothes.
  2. Soft brush: There may be stains present on the clothes that need cleaning. Therefore, a soft brush will help remove these stains and restore an original look of the material.

Steps involved in the process to clean velvet

Make sure that all the supplies needed for performing the process are available. In case you have
selected a cleaning agent other than baking soda, we recommend ensuring that the cleaning agent

selected is suitable for cleaning velvet clothes. In case, the readers use baking soda for
performing the velvet cleaning process then we recommend preparing an appropriate solution,
which will help in obtaining effective results. Once the baking soda cleaning solution has been
prepared then the readers can start the velvet cleaning process. The steps involved are as below:

  1. In the first step, brush the items with the help of a soft brush. We also recommend using a lint-free cloth for the brushing purposes.
  2. Now, rinse the velvet clothes in water so that the dirt and dust particles present on it gets removed. This will also make it easy to apply the cleaning agent.
  3. Now, apply the cleaning solution on all parts of the item. 
  4. With the help of the soft brush, rub those areas where stains are present or those areas, which require maximum attention.
  5. Continuing the process until the stains and dirt start to come off.
  6. Rinse the velvet item again with water in order to remove the cleaning agent residue.
  7. In the end, dry the item in the air or with the help of a dryer.

How to Perform the Deep Marble Cleaning Process?

Marble cleaning is a process that needs to be performed regularly at homes and office buildings since marble is ubiquitous these days. Marble is a remarkable stone used regularly in the construction and designing of various structures in buildings such as floors, stairways, counter tops, pillars, etc. However, due to excessive and long-term use, the shine of the marble starts to fade and, dirt, stains, and scratches may start to appear on its surface. Therefore, the marble cleaning process covering all aspects of deep cleaning i.e. maintenance, removing dirt, stains, and scratches should be performed regularly. In this article guide, we will explain the steps involved in the deep cleaning of marble at home and commercial buildings.

Marble Maintenance Tips and Precautions

Some of the tips and precautions that we recommend in order to protect it from hard stains and scratches are as follows:

  1. Marble is prone to getting scratches when it comes in contact with sharp objects. Therefore, it is advisable to avoid placing sharp-edged directly in contact with the marble surface. It is advisable to use rags in the sitting area, paddings under the chairs and mats over the countertops.
  2. Dust may start accumulating and sticking to the surface of the marble structure. However, this will be easily noticeable, as it will affect the shine of the marble rendering it dull and drab. It is advisable to clean the marble frequently in order to avoid hard stains.
  3. Some marble structures in the house will be used more often than the others. Keep cleaning these areas with the help of a damp cloth i.e. a soft cloth dipped in water.
  4. After every time you have cleaned the marble with a damp cloth of water, it is advisable to dry it completely. Marble is also susceptible to water stains that can give an uninviting look to it.
  5. Use natural cleaners to clean the marble regularly as the chemicals can affect its shine as well.

The process of Removing Stains from Marble

Stains removal is an important step during the deep marble cleaning process since various stains may regularly appear on marble due to spillage and contact. The steps involved in stain removal are as follows:

  1. Rinse the stained area with the help of hot water.
  2. Apply baking soda paste on the stained area and let it rest there for 24 hours. Place a plastic bag on it so that it stays in its place.
  3. Now, after the appropriate time has passed, remove the plastic bag and clean the baking soda paste with the help of a soft cloth.
  4. The same process can also be performed using hydrogen peroxide and cornstarch in order to remove hard stains.

The process to Remove Scratches from Marble

Marble cleaning involves the process of scratch removal in order to restore the originality and shine of the structure. The steps involved in the scratch removal process are as follows:

  1. Clean the area with the help of warm water and a soft cloth.
  2. Now, use fine grain sandpaper for rubbing on the area having scratches.
  3. The gentle cleaning should continue until it removes the scratches.

How to effectively carry out routine ear cleaning?

How to effectively carry out routine ear cleaning

Ear cleaning is necessary since over the course of time too much earwax and other dirt particles may start to accumulate in the ear cavity. Small insects and germs may also start to grow and multiply inside the ear cavity, which can lead to other problems such as infection. An unclean ear will also cause hearing and balancing issues for the people. Some people also experience ear pain when they do not clean their ears on a regular basis. It is, therefore, recommended to perform regular ear cleaning process so that issues can be resolved quickly and it may not become necessary to seek professional help. We will describe the ear cleaning process below:

Necessary precautions before performing the cleaning process

We recommend considering some precautions before performing the ear cleaning process.
They are given as below:

  1. Make sure that there is no infection in any ear since cleaning under such circumstances can prove to be counterproductive. In case there is an infection, we recommend seeking professional help.
  2. Make sure that eardrums are not perforated because in those cases, professional help may be needed and self-cleaning can cause more damage.
  3. Make sure that nothing is used during the process, which can result in a bad reaction.
  4. Make sure that the tools used during the process are clean or sterilized.

Steps involved in the process to clean ears

Following steps should be followed carefully:

  1. We recommend using a proper cleaning solution for softening wax accumulated in ears. The solution can be prepared at home by combining carbamide peroxide solution with Mineral oil and glycerin in an appropriate quantity.
  2. Make sure to arrange an applicator with the help of which the cleaning solution can be easily applied to the ears.
  3. Tilt your head in such a way that your ear is facing upwards. Now pour an appropriate quantity of the cleaning solution into the ear.
  4. Let this solution stay in the ear for a few minutes so that it can soften the wax and break the bond between ear skin and dirt particles.
  5. Now drain the cleaning solution out of the ear in an empty bowl.
  6. Now flush the ear with the help of lukewarm water so that wax and residue of the
    cleaning solution can be removed.
  7. Perform the same process on the second ear as well.
  8. Perform the process again in case the ears are still not properly cleaned.
  9. Dry the ears afterwards.

How to carry out the Oil Spill Cleanup process?

Oil Spill Cleanup process has to be performed mostly at sea or industry where the workers have to deal with the huge quantity of oils. In cases, when the oil containers are overfilled or damaged, there is a high probability of spillage of the oil. Similarly, at homes, the residents use different oil substances for various purposes such as cooking oil. In addition, if the oil is stored in the basement of the house for a long period, there is always a high chance of its spillage. In such cases, an oil spill cleanup process has to be performed so that the hazardous impacts of an oil spill can be avoided. In this article, we will explain a spillage control process at homes.

Issues Caused by Spilled and Stagnant Oil

There are a number of issues caused by spilled and stagnant oil. Some of the issues are stated below:

Most oils are usually of high affinity and they catch fire quickly. Most oils burn in an
explosion causing huge loss to the surrounding. It is, therefore, necessary to clean oil
as soon as possible or keep flammable things away from it.

An oil spill can damage the area where it stays for a significant period of time. If it spills on the carpet or wooden floor then the cleaning process can be extremely difficult.

Due to an oil spillage, an odor will linger in the area as most oils have a unique fragrance. The odor can be a source of constant annoyance for the residents. Exposure to certain oils can cause health issues for the residents. If spilled oil is not disposed of properly, it can cause biohazards and issues for animals and insects.

Performing the Oil Spill Cleanup Process

Following steps are involved in the oil spill cleanup process at home:In the first step, you need to determine the nature of the spilled oil. All precautionary measures need to be taken in case the spilled oil is of inflammable nature. The worker should be wearing the safety gear in order to avoid any unforeseen circumstance. Now, the oil spill cleanup has to be initiated. In order to perform the cleaning, an absorbent material will come handy. Popular absorbent materials are cat litter, sawdust or porous materials. Place the absorbent material on the spilled oil. The material will absorb the oil until it can absorb no more. Place the absorbent material at all the places where the oil has spilled so that most of the oil can be removed this way. Now, store the absorbent material in a proper way so that it can be disposed of properly.

In the second stage, there is a need to clean the spilled area. After the oil has been absorbed, a minute quantity of oil and stains will still be left behind. Use soap and hot water to clean the area. Scrub properly until the area has been properly cleaned. In the end, properly ventilate the area so that odor can be removed.

Best way to perform Cupboard Cleaning Process

Best way to perform Cupboard Cleaning Process

Cupboard Cleaning should be regularly performed in order to keep it clean, good looking and healthy. An unclean cupboard presents a sore sight for the onlookers, affects the quality of the stored items and provides a suitable environment for microbial to grow. Wooden cupboards are badly affected by insects, which thrive on eating woody substance resulting in reducing the life of the cupboard. Similarly, microbial growing inside the cupboard can spread to other parts of the building resulting in health hazards. It is, therefore, necessary to perform the regular

cupboard cleaning process both in domestic and commercial buildings. Cupboard cleaning involves removing dirt and dust particles from the cabinets, removing cobwebs, removing odor and microbial from the whole structure. It is recommended to perform the cleaning process out in the air so that the dirt and insects from the cupboard may not settle in other parts of the building. After performing the cleaning process, it is also recommended to leave the cupboard in open for some time so that it can dry and get exposed to fresh air.

Supplies Required to Perform Cupboard Cleaning Process

Supplies required to perform the cleaning process may depend upon the nature of the material. Different cleaning agents may be required for wooden or steel cupboards. Similarly, scrubbers and pads may be required depending upon the material. However, some standard supplies will be required in order to perform the process as follows:

  1. Vacuum Cleaner: This will be able to effectively remove the dirt and dust particles from the cupboard. Cobwebs will also be sucked by the vacuum cleaner. A vacuum cleaner with a long hose may be used for reaching all parts of the cupboard.
  2. Cleaning Agent: There may be stains present inside the cupboard, which will need a thorough cleaning. They can be removed with the help of a cleaning agent. An
    appropriate cleaning agent may be used depending upon the material of the cupboard.
  3. Soft Cloth: A soft piece of cloth will help in cleaning the stains.
  4. Scrubber or Pads: They may help in cleaning hard stains by rubbing. A sponge type material may be used for this purpose.
  5. Odor Remover: An odor remover may be used in order to remove the stench from the cupboard.
    Performing the Cupboard Cleaning Process
    Following steps will help in performing the cleaning process:
  6. Cupboard cleaning involves removal of dust, dirt, microbial and odor from the cupboard.
  7. Firstly, remove all the items from the cupboard until it is completely empty. Place it outside in the open.
  8. Secondly, remove the dirt from the cupboard with the help of a vacuum cleaner. A vacuum cleaner should be applied to all parts of the cupboard. This will remove most of the dirt and cobwebs from the cupboard.
  9. Now, the stains will be easily visible. Apply the cleaning solution on these areas and rub them with the help of a scrubber or a sponge. Continue rubbing until the stains have been removed.
  10. Now, apply the odor remover in all compartments of the cupboard.
  11. Leave the cupboard in the open for some time so that it can get some fresh air.