How to effectively carry out routine ear cleaning?

How to effectively carry out routine ear cleaning

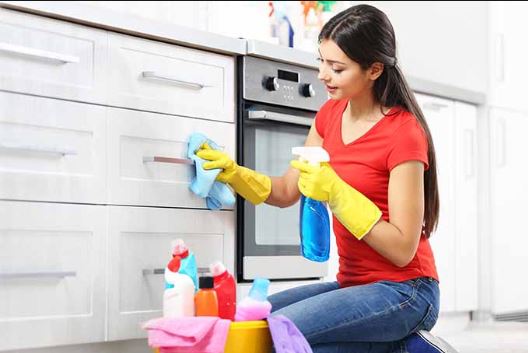
Ear cleaning is necessary since over the course of time too much earwax and other dirt particles may start to accumulate in the ear cavity. Small insects and germs may also start to grow and multiply inside the ear cavity, which can lead to other problems such as infection. An unclean ear will also cause hearing and balancing issues for the people. Some people also experience ear pain when they do not clean their ears on a regular basis. It is, therefore, recommended to perform regular ear cleaning process so that issues can be resolved quickly and it may not become necessary to seek professional help. We will describe the ear cleaning process below:

Necessary precautions before performing the cleaning process

We recommend considering some precautions before performing the ear cleaning process.
They are given as below:

  1. Make sure that there is no infection in any ear since cleaning under such circumstances can prove to be counterproductive. In case there is an infection, we recommend seeking professional help.
  2. Make sure that eardrums are not perforated because in those cases, professional help may be needed and self-cleaning can cause more damage.
  3. Make sure that nothing is used during the process, which can result in a bad reaction.
  4. Make sure that the tools used during the process are clean or sterilized.

Steps involved in the process to clean ears

Following steps should be followed carefully:

  1. We recommend using a proper cleaning solution for softening wax accumulated in ears. The solution can be prepared at home by combining carbamide peroxide solution with Mineral oil and glycerin in an appropriate quantity.
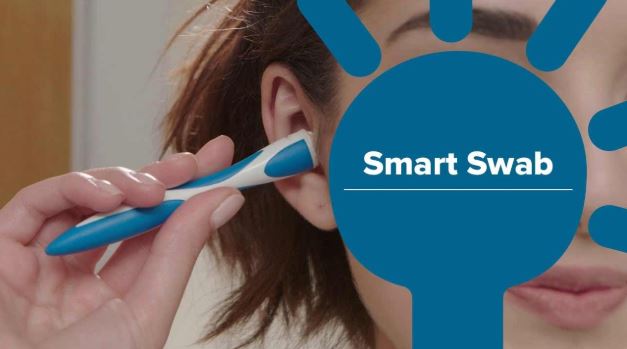
  2. Make sure to arrange an applicator with the help of which the cleaning solution can be easily applied to the ears.
  3. Tilt your head in such a way that your ear is facing upwards. Now pour an appropriate quantity of the cleaning solution into the ear.
  4. Let this solution stay in the ear for a few minutes so that it can soften the wax and break the bond between ear skin and dirt particles.
  5. Now drain the cleaning solution out of the ear in an empty bowl.
  6. Now flush the ear with the help of lukewarm water so that wax and residue of the
    cleaning solution can be removed.
  7. Perform the same process on the second ear as well.
  8. Perform the process again in case the ears are still not properly cleaned.
  9. Dry the ears afterwards.

How to carry out the Oil Spill Cleanup process?

Oil Spill Cleanup process has to be performed mostly at sea or industry where the workers have to deal with the huge quantity of oils. In cases, when the oil containers are overfilled or damaged, there is a high probability of spillage of the oil. Similarly, at homes, the residents use different oil substances for various purposes such as cooking oil. In addition, if the oil is stored in the basement of the house for a long period, there is always a high chance of its spillage. In such cases, an oil spill cleanup process has to be performed so that the hazardous impacts of an oil spill can be avoided. In this article, we will explain a spillage control process at homes.

Issues Caused by Spilled and Stagnant Oil

There are a number of issues caused by spilled and stagnant oil. Some of the issues are stated below:

Most oils are usually of high affinity and they catch fire quickly. Most oils burn in an
explosion causing huge loss to the surrounding. It is, therefore, necessary to clean oil
as soon as possible or keep flammable things away from it.

An oil spill can damage the area where it stays for a significant period of time. If it spills on the carpet or wooden floor then the cleaning process can be extremely difficult.

Due to an oil spillage, an odor will linger in the area as most oils have a unique fragrance. The odor can be a source of constant annoyance for the residents. Exposure to certain oils can cause health issues for the residents. If spilled oil is not disposed of properly, it can cause biohazards and issues for animals and insects.

Performing the Oil Spill Cleanup Process

Following steps are involved in the oil spill cleanup process at home:In the first step, you need to determine the nature of the spilled oil. All precautionary measures need to be taken in case the spilled oil is of inflammable nature. The worker should be wearing the safety gear in order to avoid any unforeseen circumstance. Now, the oil spill cleanup has to be initiated. In order to perform the cleaning, an absorbent material will come handy. Popular absorbent materials are cat litter, sawdust or porous materials. Place the absorbent material on the spilled oil. The material will absorb the oil until it can absorb no more. Place the absorbent material at all the places where the oil has spilled so that most of the oil can be removed this way. Now, store the absorbent material in a proper way so that it can be disposed of properly.

In the second stage, there is a need to clean the spilled area. After the oil has been absorbed, a minute quantity of oil and stains will still be left behind. Use soap and hot water to clean the area. Scrub properly until the area has been properly cleaned. In the end, properly ventilate the area so that odor can be removed.

Best way to perform Cupboard Cleaning Process

Best way to perform Cupboard Cleaning Process

Cupboard Cleaning should be regularly performed in order to keep it clean, good looking and healthy. An unclean cupboard presents a sore sight for the onlookers, affects the quality of the stored items and provides a suitable environment for microbial to grow. Wooden cupboards are badly affected by insects, which thrive on eating woody substance resulting in reducing the life of the cupboard. Similarly, microbial growing inside the cupboard can spread to other parts of the building resulting in health hazards. It is, therefore, necessary to perform the regular

cupboard cleaning process both in domestic and commercial buildings. Cupboard cleaning involves removing dirt and dust particles from the cabinets, removing cobwebs, removing odor and microbial from the whole structure. It is recommended to perform the cleaning process out in the air so that the dirt and insects from the cupboard may not settle in other parts of the building. After performing the cleaning process, it is also recommended to leave the cupboard in open for some time so that it can dry and get exposed to fresh air.

Supplies Required to Perform Cupboard Cleaning Process

Supplies required to perform the cleaning process may depend upon the nature of the material. Different cleaning agents may be required for wooden or steel cupboards. Similarly, scrubbers and pads may be required depending upon the material. However, some standard supplies will be required in order to perform the process as follows:

  1. Vacuum Cleaner: This will be able to effectively remove the dirt and dust particles from the cupboard. Cobwebs will also be sucked by the vacuum cleaner. A vacuum cleaner with a long hose may be used for reaching all parts of the cupboard.
  2. Cleaning Agent: There may be stains present inside the cupboard, which will need a thorough cleaning. They can be removed with the help of a cleaning agent. An
    appropriate cleaning agent may be used depending upon the material of the cupboard.
  3. Soft Cloth: A soft piece of cloth will help in cleaning the stains.
  4. Scrubber or Pads: They may help in cleaning hard stains by rubbing. A sponge type material may be used for this purpose.
  5. Odor Remover: An odor remover may be used in order to remove the stench from the cupboard.
    Performing the Cupboard Cleaning Process
    Following steps will help in performing the cleaning process:
  6. Cupboard cleaning involves removal of dust, dirt, microbial and odor from the cupboard.
  7. Firstly, remove all the items from the cupboard until it is completely empty. Place it outside in the open.
  8. Secondly, remove the dirt from the cupboard with the help of a vacuum cleaner. A vacuum cleaner should be applied to all parts of the cupboard. This will remove most of the dirt and cobwebs from the cupboard.
  9. Now, the stains will be easily visible. Apply the cleaning solution on these areas and rub them with the help of a scrubber or a sponge. Continue rubbing until the stains have been removed.
  10. Now, apply the odor remover in all compartments of the cupboard.
  11. Leave the cupboard in the open for some time so that it can get some fresh air.